This guide is part of the series on creating 3D medical models, from the scan stage to a production-ready model. Here I'll demonstrate semi-automatic segmentation of bone, which is usually the easiest to perform (as long as you're not dealing with complex fractures).
With soft tissue the stages are similar, but there's usually more manual work, because HU ranges overlap more between tissue types. I'll also show, briefly, full automatic segmentation using the TotalSegmentator extension.
One note: the principles shown here are nearly identical in every medical segmentation software. The main differences are the interface, the available tools, and the automation capabilities. The demo here uses 3D Slicer, a free, open-source program used by radiologists, medical engineers, and scientists worldwide. Download link at the end.
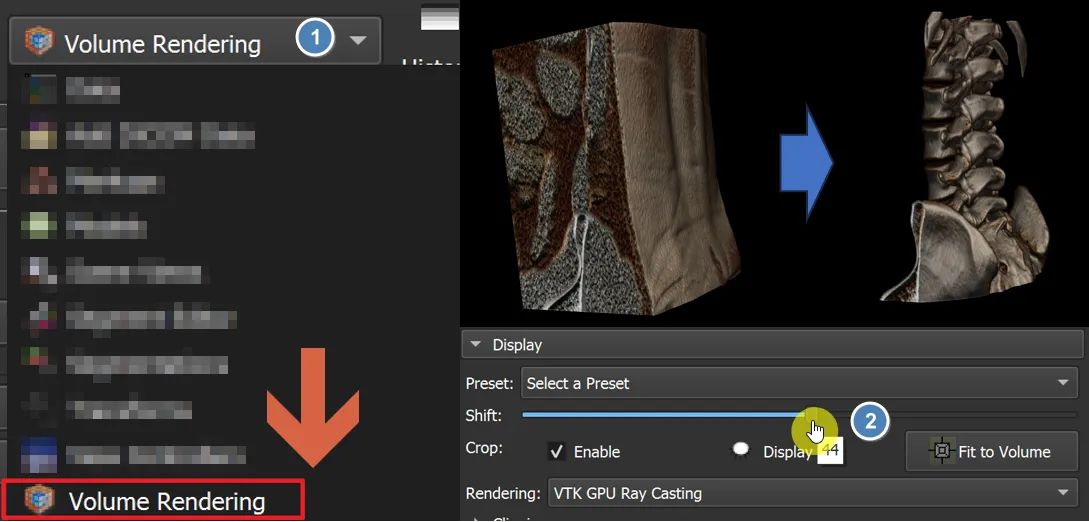
1. Open the DICOM file and set the display
Load the CT file into 3D Slicer. Go to Volume Rendering and choose a suitable preset (for example, CT Abdomen) to adjust the contrast. You can also change the contrast manually to a version that's more comfortable to work with.
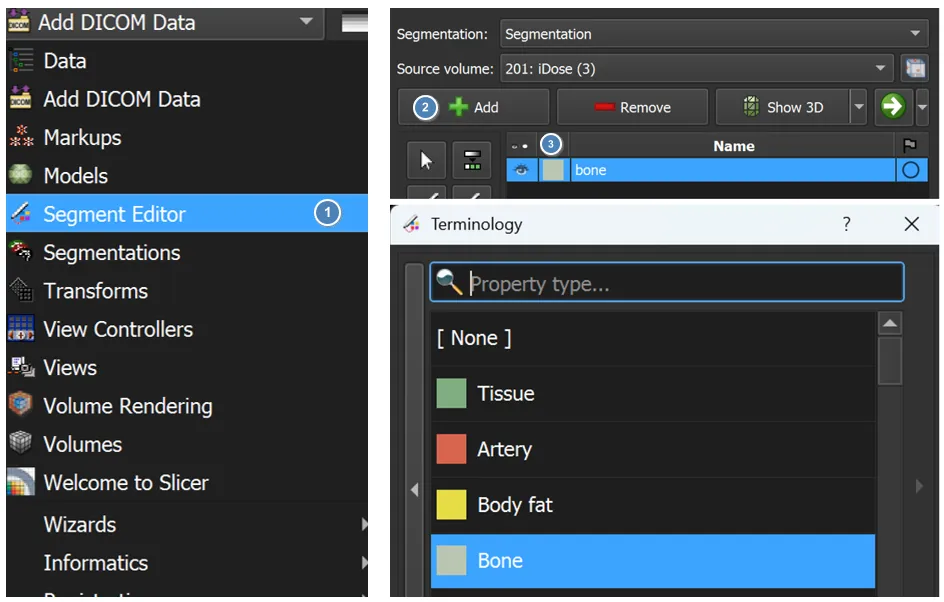
2. Create a new segment and set a color
Go to the Segment Editor, create a new segment (Add), and choose a bold color that makes the structure easy to identify.
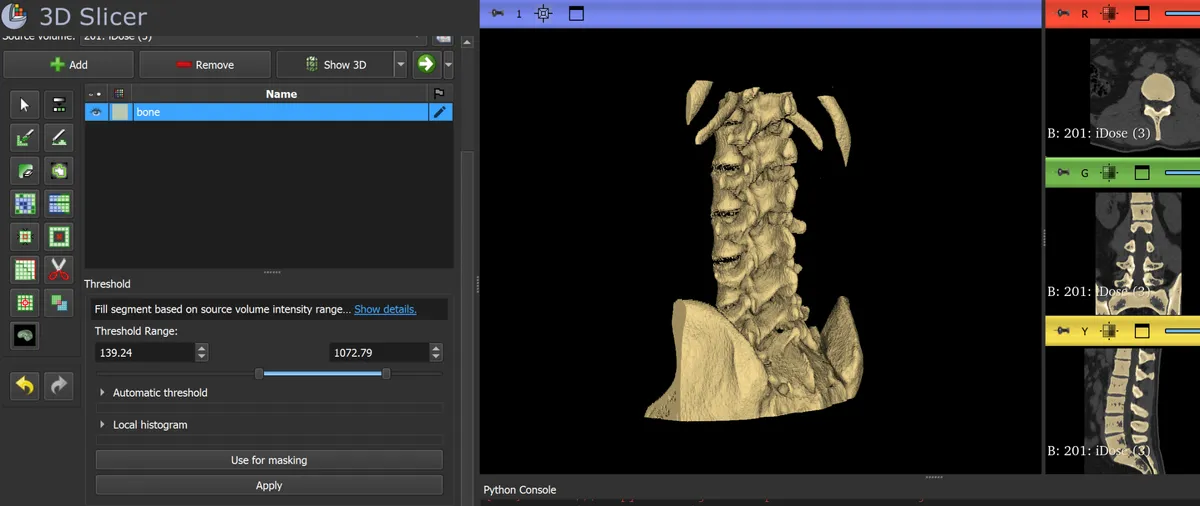
3. Segment with Threshold
Select the Threshold tool to set HU values appropriate for bone (for example, from about +150 and up, depending on the case). Make sure you include most of the bone while minimizing noise from soft-tissue regions.
4. Clean up with Islands
Choose Islands > Keep Selected Island, then click the part of the bone you want to keep. This automatically removes unwanted objects.

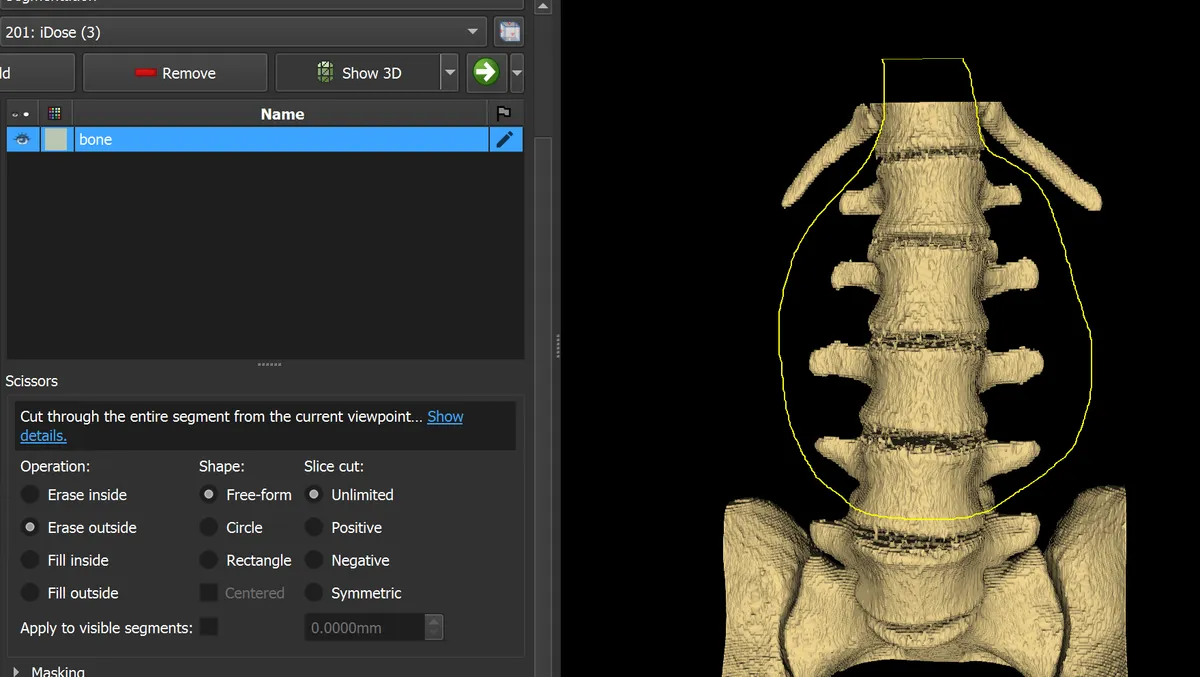
5. Crop to the region of interest
Use the Scissors tool in Erase Outside mode. Outline the region you want (for example, the lumbar vertebrae) to remove everything else.
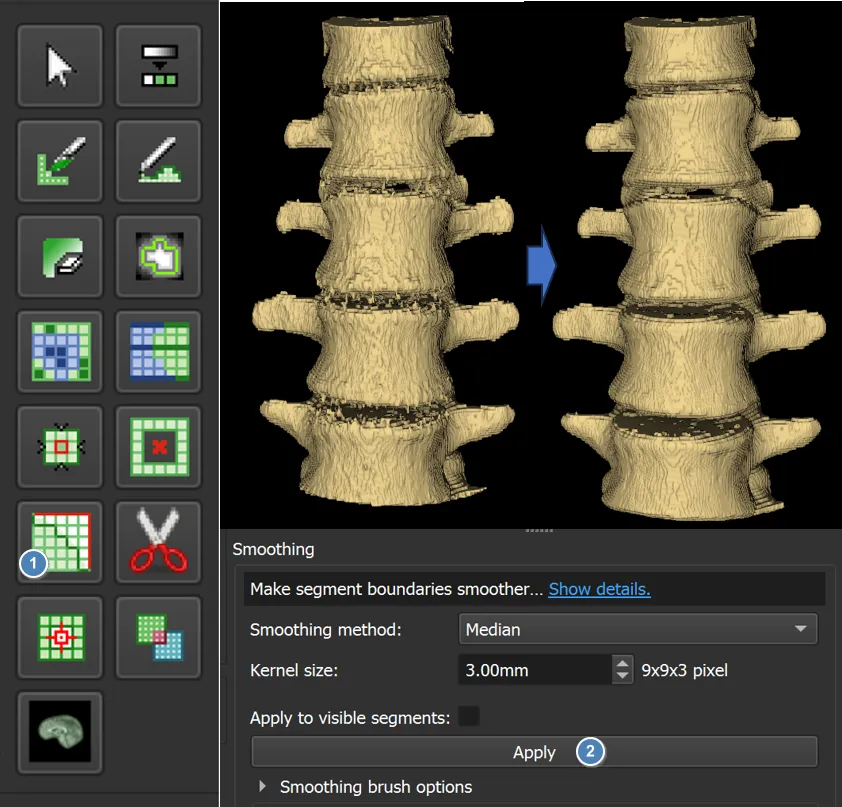
6. Improve model quality with smoothing
Two smoothing operations help: Closing (small kernel) to close small holes, and Median smoothing (large kernel) for general smoothing and noise reduction.
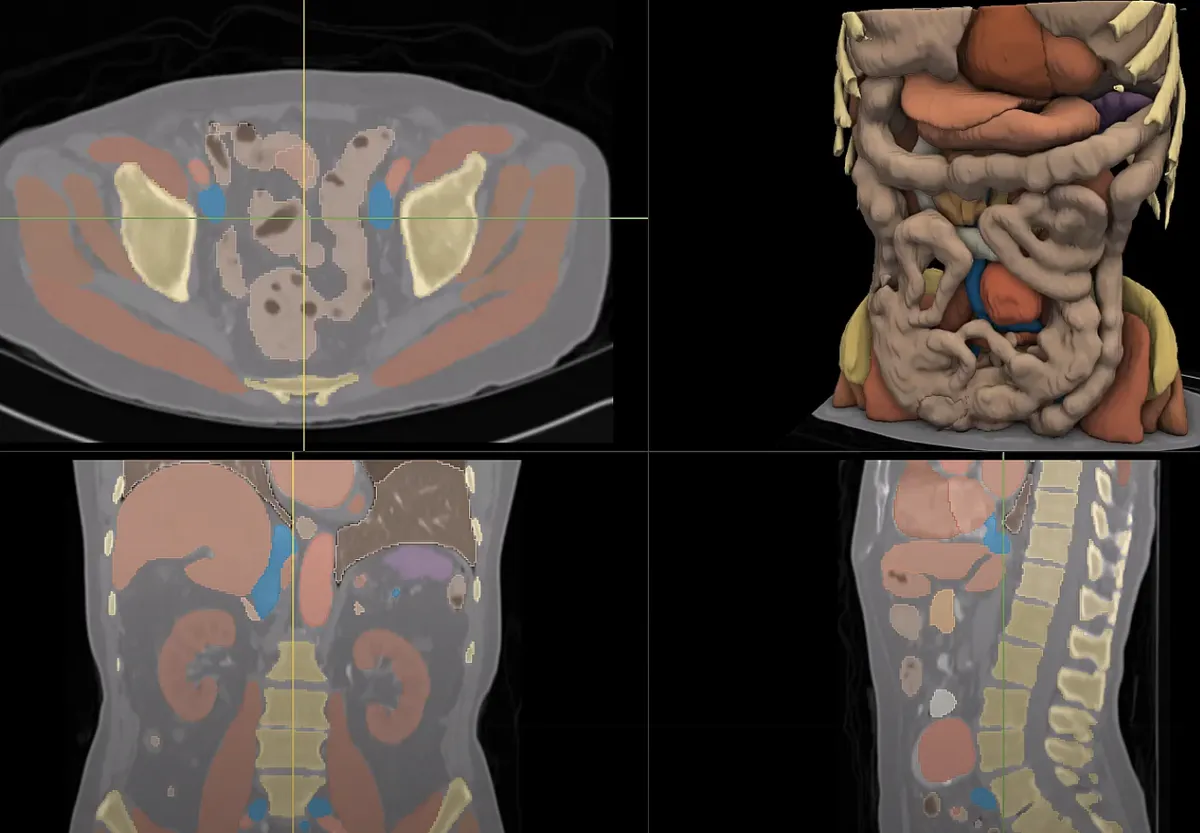
7. Automatic segmentation with TotalSegmentator
When you need to segment many structures, you can use the TotalSegmentator extension: install it through the 3D Slicer Extension Manager, run it on a DICOM file, and the tool extracts dozens of anatomical structures automatically. Human medical review is always required for corrections and final approval.
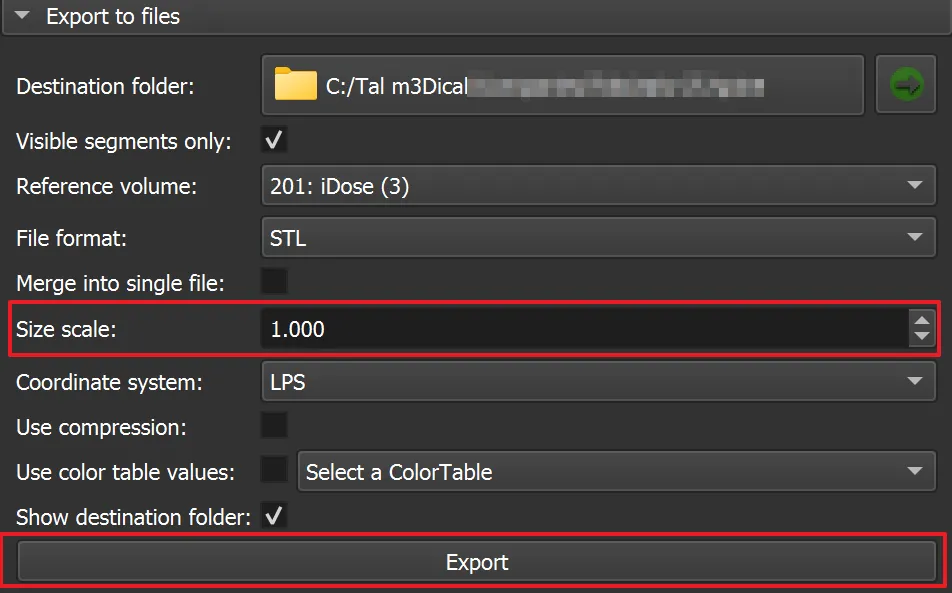
8. Export to STL
Go to Segmentations > Export and save the segment as an STL file, ready for printing or for editing in another program.
Tips from the field
- The more accurate the initial Threshold setup, the shorter the manual editing time.
- For soft tissue, combine Threshold with slice-by-slice manual marking in complex regions.
- Working with a radiologist or surgeon at this stage saves you from late-stage rework.
Relevant links
- 3D Slicer, Volume Rendering official documentation
- 3D Slicer, Segment Editor full segmentation guide
- TotalSegmentator extension for full automatic segmentation
- Hounsfield scale, HU values in CT
- DICOM, the medical imaging file format
- Download 3D Slicer